Grilled Cheese Roll-Ups
Why make this recipe
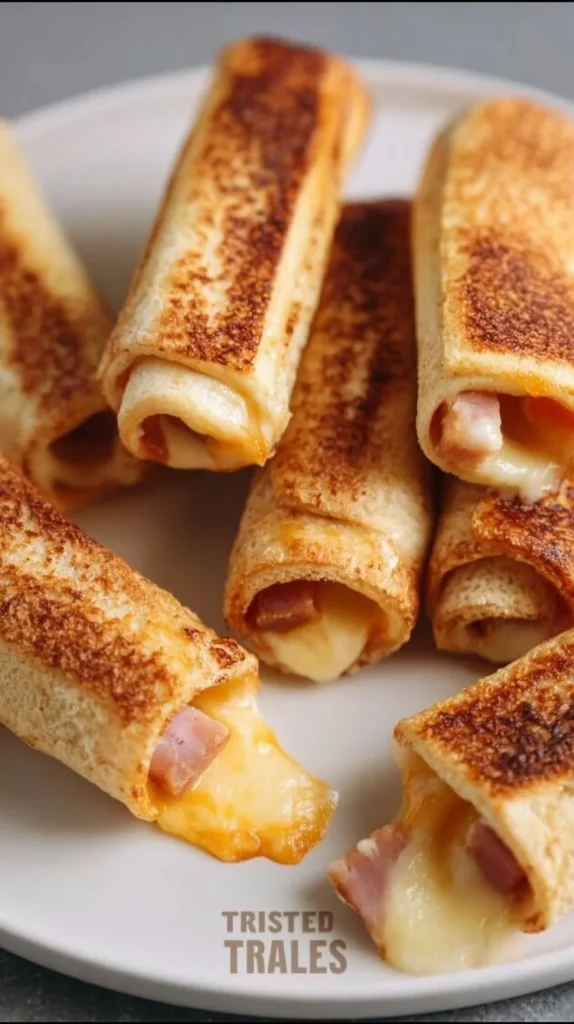
Grilled Cheese Roll-Ups are a fun twist on the classic grilled cheese sandwich. They are easy to make, delicious to eat, and perfect for both kids and adults. These roll-ups are not only a great snack but also a wonderful addition to lunch boxes or party platters. The crispy outside and gooey cheese inside create a comforting flavor that everyone loves.
How to make Grilled Cheese Roll-Ups
Ingredients:
- 4 slices of bread (your choice)
- 4 slices of cheese (like cheddar or American)
- 1 tablespoon of butter
- Optional: marinara sauce for dipping
Directions:
- Start by removing the crusts from the bread slices.
- Using a rolling pin, gently flatten each slice of bread.
- Place a slice of cheese on each piece of flattened bread.
- Roll the bread tightly around the cheese, making sure it’s secure.
- Heat the butter in a skillet over medium heat.
- Place the roll-ups seam side down in the skillet.
- Cook for about 2-3 minutes on each side or until golden brown.
- Remove from the skillet and let them cool slightly before serving.
How to serve Grilled Cheese Roll-Ups
Serve these roll-ups warm with a side of marinara sauce for dipping. They are great for a quick lunch, snack, or as finger food at parties. You can also pair them with a fresh salad or soup for a more filling meal.
How to store Grilled Cheese Roll-Ups
If you have leftovers, allow the roll-ups to cool completely. Place them in an airtight container in the refrigerator. They can last for 2-3 days. To reheat, you can warm them in the skillet or microwave until heated through.
Tips to make Grilled Cheese Roll-Ups
- Try using different types of cheese for a unique flavor.
- You can add other fillings like sliced ham or cooked bacon.
- For a healthier alternative, use whole-grain bread.
Variation
You can create a sweet version of Grilled Cheese Roll-Ups by using Nutella or peanut butter instead of cheese, and serve with a drizzle of honey.
FAQs
1. Can I use gluten-free bread?
Yes, gluten-free bread works well for this recipe.
2. Can I freeze the roll-ups?
Yes, you can freeze them before cooking. Just place them in a freezer-safe container, and they can be stored for up to a month.
3. What cheese is best for roll-ups?
Cheddar and American cheese are popular choices, but you can use any cheese that melts well, such as mozzarella or provolone.
Grilled Cheese Roll-Ups
Ingredients
Method
- Start by removing the crusts from the bread slices.
- Using a rolling pin, gently flatten each slice of bread.
- Place a slice of cheese on each piece of flattened bread.
- Roll the bread tightly around the cheese, making sure it’s secure.
- Heat the butter in a skillet over medium heat.
- Place the roll-ups seam side down in the skillet.
- Cook for about 2-3 minutes on each side or until golden brown.
- Remove from the skillet and let them cool slightly before serving.